Setting up a Local Multi-Tier Java Web Application Manually: A Beginner's Guide


Introduction
Are you an aspiring DevOps engineer looking to sharpen your skills and dive into a hands-on project? If so, you're in the right place. In this article, we'll walk you through the process of setting up a local multi-tier Java web application, and we'll make it so straightforward that even a newborn child could follow along! 😃
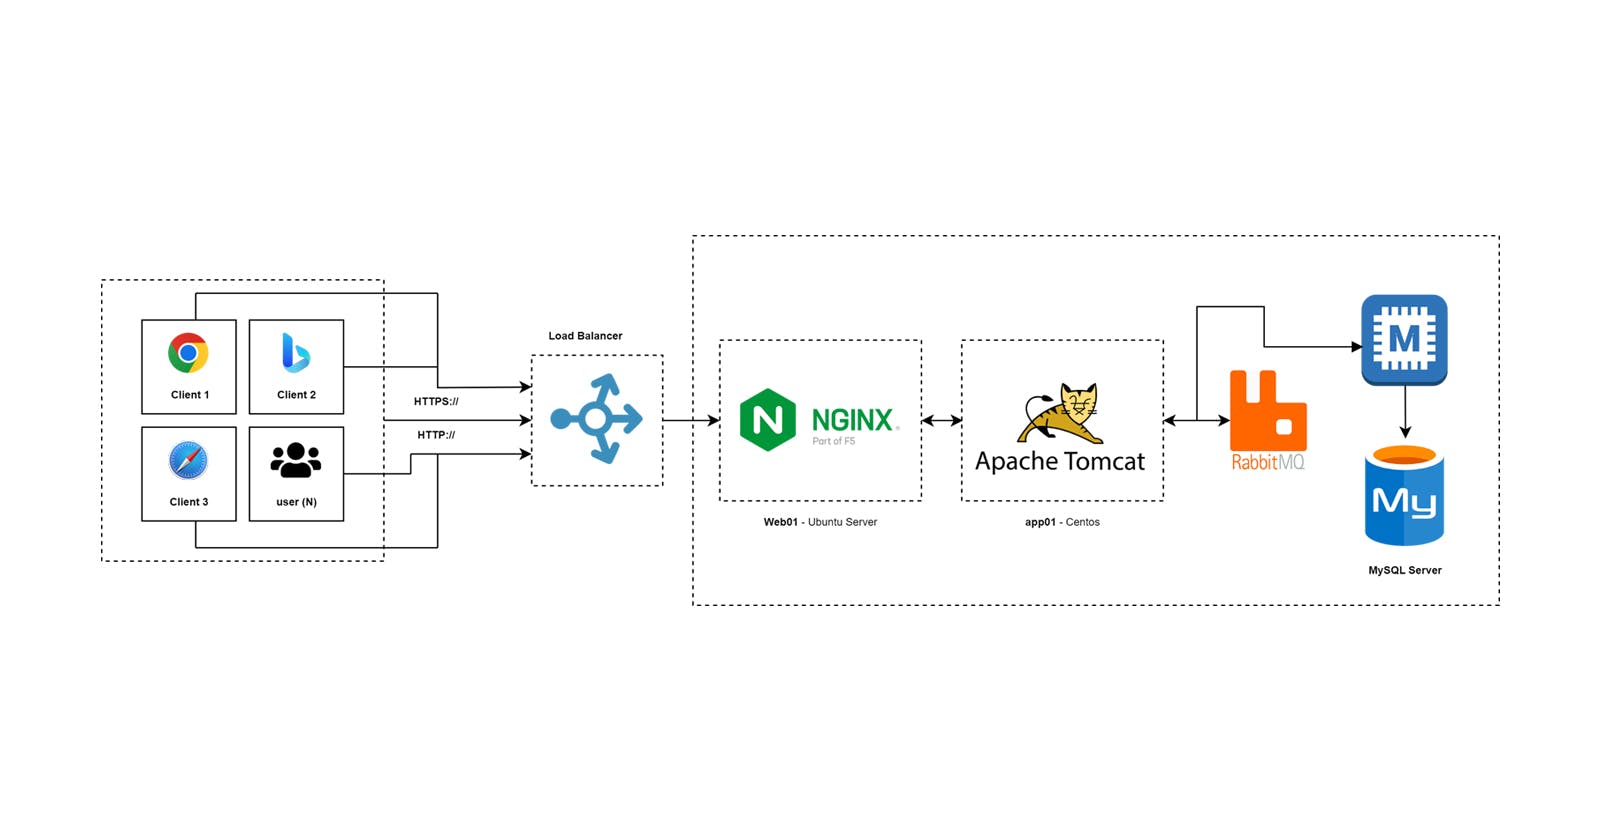
In this comprehensive guide, we will use tools like Vagrant and VirtualBox to create a local development environment. You'll learn how to configure and manage essential services like MySQL, Memcached, RabbitMQ, Tomcat, and Nginx, all while gaining valuable experience in areas such as Linux networking.
So, whether you're completely new to the world of DevOps or looking to expand your skill set, join us on this exciting journey as we demystify the process of setting up a local multi-tier Java web application sourced from a GitHub repository.
Prerequisites
Before you get started with setting up your local multi-tier web application, make sure you have the following:
Computer with Adequate Resources: You'll need a computer with sufficient CPU, RAM, and disk space to accommodate the virtual machines we'll be creating. A modern desktop or laptop with at least 8GB of RAM and a multi-core processor is recommended. If you're unsure about your computer's specifications, you can check your system's specifications here.
Internet Connection: An active and stable internet connection is essential for downloading necessary software packages, updates, and additional resources during the setup process.
Basic Computer Skills: Having fundamental computer skills, such as file management and software installation, will be beneficial for this project.
Basic Linux Command Skills: Since we'll be working with Linux-based tools and commands, having a basic understanding of Linux commands will be helpful. If you're a Windows user, some familiarity with the Windows command line will also be useful. Basic Git Skills: Git will be used for version control and collaboration during the project. Familiarity with basic Git operations, like cloning repositories and committing changes, is recommended. You can easily reference a Git cheat sheet for quick guidance on Git commands.
1. Initial Setup
a. Install Required Software
Before proceeding, it's essential to have the following software installed on your local machine or system. If you're unsure how to install any of these, click on each of the software links below to learn more and install them.
Once you have these software packages installed, you can return to continue with the setup process.
b. Set Up Your Project Folder and Create a Vagrantfile
Start by creating a project folder 📁. You can name it "vprofile" or choose a name that suits your project.
Navigate to the project folder using your preferred method. You can use the command line and the
cdcommand, or open the folder in a code editor like Visual Studio Code.Create a Vagrantfile within your project folder. If you're using Linux, you can create it with the following command:
touch VagrantfileAdd the following configuration code to your Vagrantfile. This code defines the setup for five virtual machines, each serving a different purpose and having its unique IP address. This setup ensures there's no IP conflict, and it uses VirtualBox as the hypervisor technology and also automatically manages host entries for each VM, ensuring they can communicate using friendly hostnames.
 Vagrant.configure("2") do |config|
   # Enable the Vagrant HostManager plugin
   config.hostmanager.enabled = true
   # Automatically manage the /etc/hosts file on the host machine
   config.hostmanager.manage_host = true

   # Configuration for the DB VM
   config.vm.define "db01" do |db01|
     # Add DB VM configuration here
     db01.vm.box = "eurolinux-vagrant/centos-stream-9"
     db01.vm.hostname = "db01"
     db01.vm.network "private_network", ip: "192.168.56.55"
     db01.vm.provider "virtualbox" do |vb|
       vb.memory = "600"
     end
   end

   # Configuration for the Memcache VM
   config.vm.define "mc01" do |mc01|
     # Add Memcache VM configuration here
     mc01.vm.box = "eurolinux-vagrant/centos-stream-9"
     mc01.vm.hostname = "mc01"
     mc01.vm.network "private_network", ip: "192.168.56.54"
     mc01.vm.provider "virtualbox" do |vb|
       vb.memory = "600"
     end
   end

   # Configuration for the RabbitMQ VM
   config.vm.define "rmq01" do |rmq01|
     # Add RabbitMQ VM configuration here
     rmq01.vm.box = "eurolinux-vagrant/centos-stream-9"
     rmq01.vm.hostname = "rmq01"
     rmq01.vm.network "private_network", ip: "192.168.56.53"
     rmq01.vm.provider "virtualbox" do |vb|
       vb.memory = "600"
     end
   end

   # Configuration for the Tomcat VM
   config.vm.define "app01" do |app01|
     # Add Tomcat VM configuration here
     app01.vm.box = "eurolinux-vagrant/centos-stream-9"
     app01.vm.hostname = "app01"
     app01.vm.network "private_network", ip: "192.168.56.52"
     app01.vm.provider "virtualbox" do |vb|
       vb.memory = "800"
     end
   end

   # Configuration for the Nginx VM
   config.vm.define "web01" do |web01|
     # Add Nginx VM configuration here
     web01.vm.box = "ubuntu/jammy64"
     web01.vm.hostname = "web01"
     web01.vm.network "private_network", ip: "192.168.56.51"
     web01.vm.provider "virtualbox" do |vb|
       vb.gui = true
       vb.memory = "800"
     end
   end
 end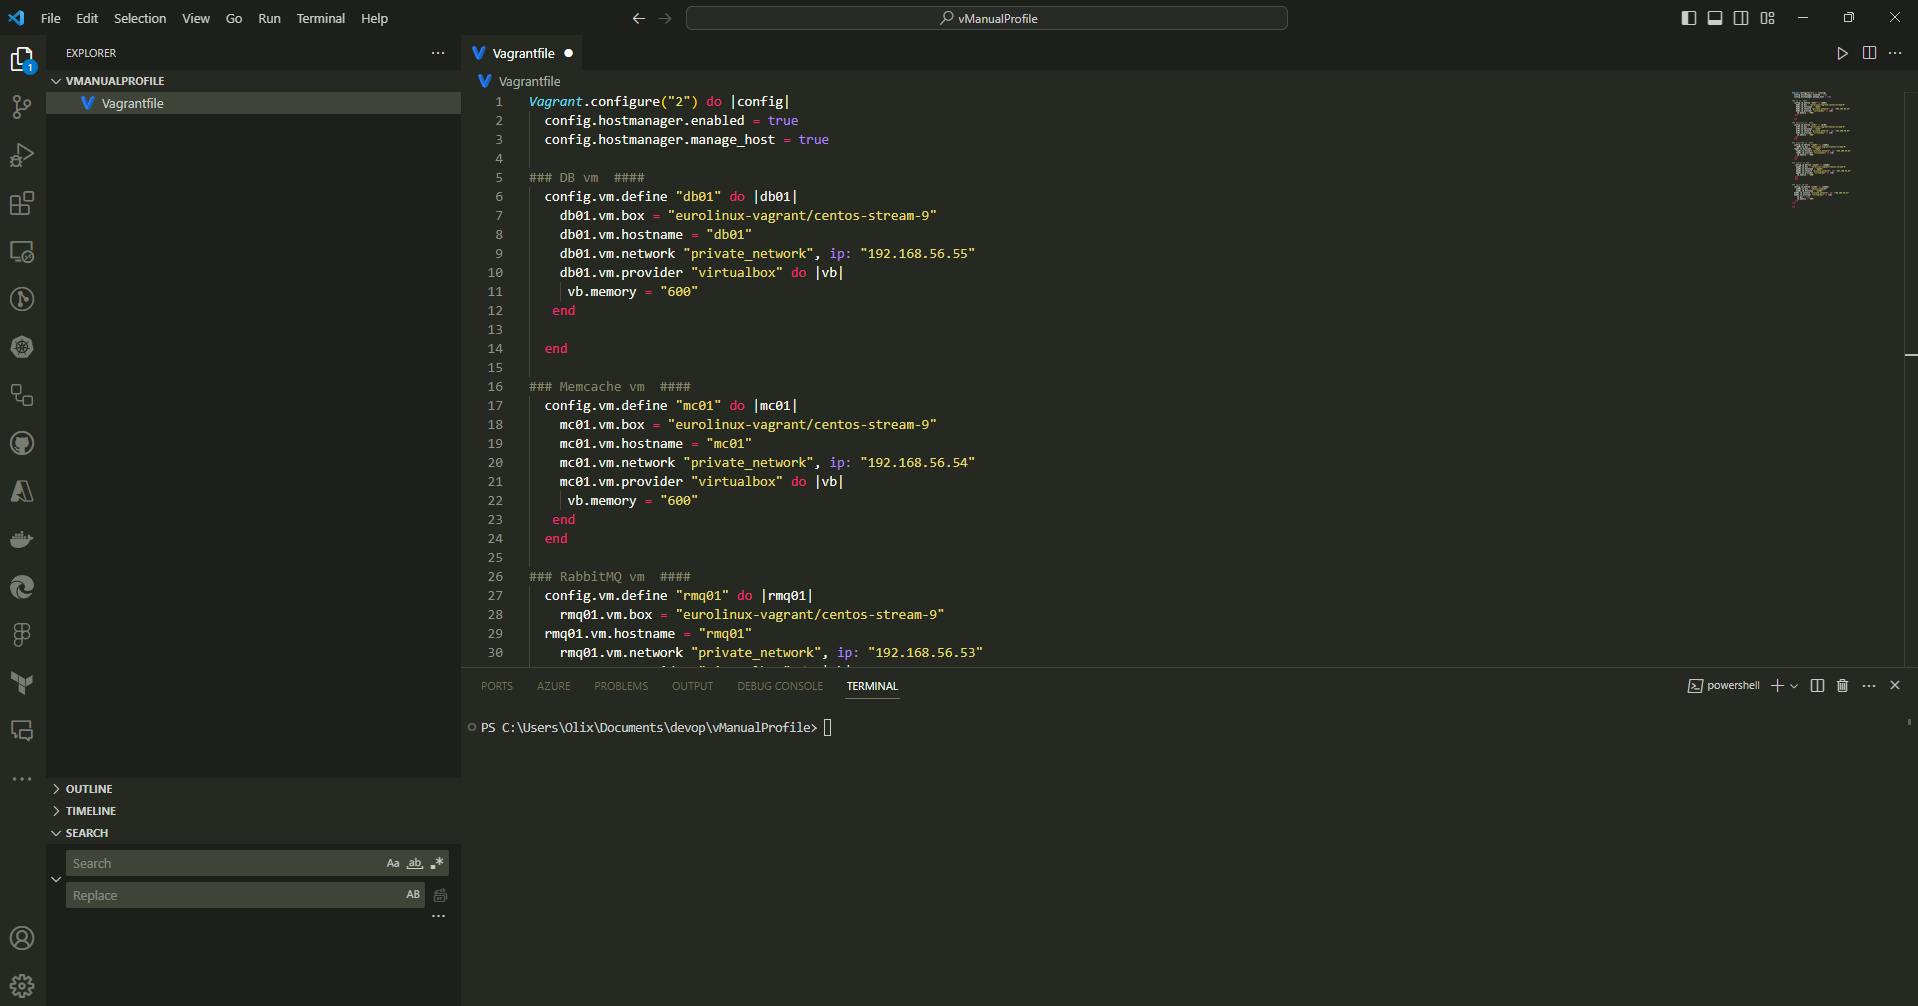
Save the files, and run the following command
vagrant plugin install vagrant-hostmanagerThese virtual machines will serve different services within your multi-tier web application.
In the project directory, run the script:
vagrant up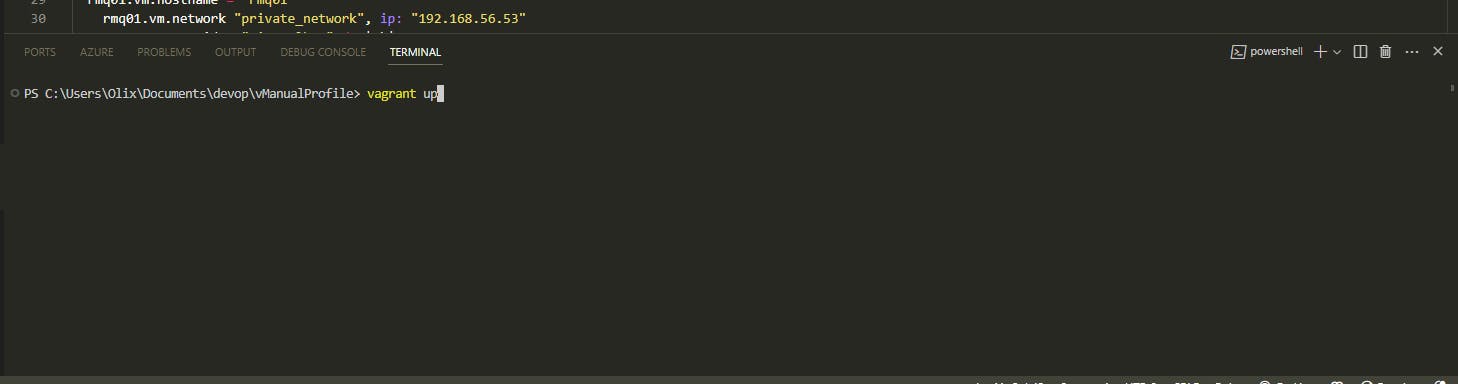
This command will start and provision the virtual machines.
To learn more about virtualization technologies and hypervisors, you can refer to the following resources:
Why the Order of Setup Matters
Before we proceed to set up the application services, it's essential to understand why we follow this specific order:
Database First: The database is the cornerstone of your application, housing essential data. Setting it up first ensures that other components have a reliable data source to work with.
Memcached for Speed: Memcached is responsible for caching data, which improves data retrieval speed. By setting it up after the database, you optimize data access performance.
RabbitMQ for Communication: RabbitMQ facilitates communication between various services in a loosely decoupled manner. While services are not dependent on each other, RabbitMQ ensures they can efficiently communicate and coordinate their actions. Learn more about loosely decoupled architecture.
Server (Tomcat Apache Service): This component typically serves as the backend, containing the business logic of your application. Setting it up after RabbitMQ ensures that it can interact with other services seamlessly.
Nginx for Frontend: Nginx, used for the frontend, plays a crucial role in load balancing and routing traffic to the right resources. It ensures efficient distribution of incoming requests and helps maintain application stability.
This specific order of setup optimizes the functionality and performance of your multi-tier web application. Keep these considerations in mind as you proceed with the setup.
2. Setting Up the Database (MySQL/MariaDB)
a. Accessing the Database VM
To access the Database VM, open your terminal and use the following command:
vagrant ssh db01
b. Database Setup
Log in as a user with sudo privileges:
sudo suUpdate the operating system:
yum update -yInstall the EPEL repository for additional software:
yum install epel-release -yInstall MariaDB (a MySQL fork) & git:
yum install git mariadb-server -yReason: We update the OS and install the EPEL repository for the latest updates and additional software. MariaDB is used for our database.
c. Start and Enable MariaDB
Start MariaDB:
systemctl start mariadbEnable MariaDB to start on boot:
systemctl enable mariadbReason: We start and enable MariaDB to ensure it's running and set to start automatically on boot.
d. Secure the MariaDB Installation
Run the MySQL secure installation script:
mysql_secure_installation
Follow the prompts to configure MariaDB:
Set the root password (e.g., 'admin123'). You can choose yours but you will need to remember it, for easy use, just use this admin123 then you can later do the project again by changing the user credentials to suit your needs.
Remove anonymous users.
Disallow root login remotely (choose 'n' for 'no' to keep it allowed if needed).
Remove the test database and access it.
Reload the privilege tables when prompted.
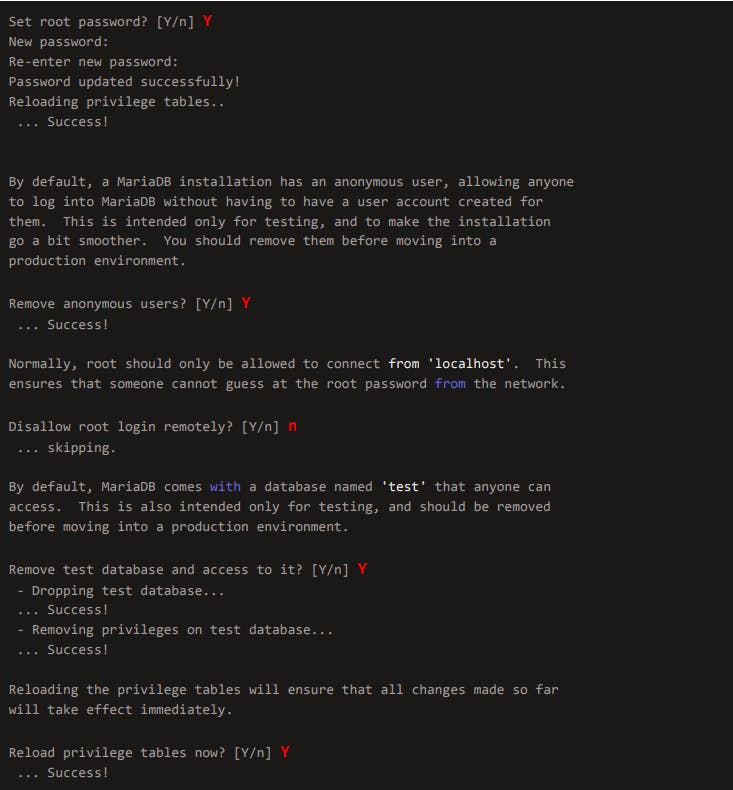
Reason: This script helps secure the MariaDB installation by setting a root password and other security-related configurations.
e. Set DB Name and Users
Access the MySQL shell with your configured root password:
mysql -u root -padmin123 # Always ensure you add p to your password
Inside the MySQL interactive environment, create a database named 'accounts' and a user 'admin' with privileges:
CREATE DATABASE accounts;
GRANT ALL PRIVILEGES ON accounts.* TO 'admin'@'%' IDENTIFIED BY 'admin123';
FLUSH PRIVILEGES;
EXIT;
f. Download the Source Code and initialize the Database
Clone the application source code and initialize the database:
git clone -b main https://github.com/hkhcoder/vprofile-project.git
cd vprofile-project
mysql -u root -padmin123 accounts < src/main/resources/db_backup.sql
mysql -u root -padmin123 accounts
The < is used to redirect the content or copy the content of the repo SQL file into the new user that just created which is called an account.
Within the MySQL shell, you can check if the tables have been created:
show tables;
exit; # exit the shell
Restart MariaDB Server
Restart the MariaDB service:
systemctl restart mariadb
h. Firewall Configuration
Start the firewall, enable it to start on boot, and allow MariaDB to access port 3306:
systemctl start firewalld
systemctl enable firewalld
firewall-cmd --get-active-zones
firewall-cmd --zone=public --add-port=3306/tcp --permanent
firewall-cmd --reloadsystemctl restart mariadb
Reason: These steps configure and secure the MariaDB installation, initialize the database, and set up the firewall to allow MariaDB access on port 3306.
Note: The application source code is provided by 'hkhcoder,' and cloning their Git repository allows you to customize and connect to the application.
3. Setting Up Memcached
a. Accessing the Memcached VM
SSH into the Memcached VM:
vagrant ssh mc01
b. Memcached Setup
Log in as a user with sudo privileges:
sudo suUpdate the operating system:
yum update -yInstall the EPEL repository:
dnf install epel-release -yInstall Memcached:
dnf install memcached -y
Reason
We update the OS and install the EPEL repository to ensure the latest updates and access to additional software. Memcached is essential for caching data, which can significantly improve application performance.
C. Start Memcached
Start the Memcached service:
systemctl enable memcachedEnable Memcached to start on boot:
systemctl enable memcachedCheck the status of Memcached:
systemctl status memcachedReason: We start and configure Memcached to cache data, enhancing application performance.
d. Memcached Configuration
Configure Memcached to listen on all IPs:
sed -i 's/127.0.0.1/0.0.0.0/g' /etc/sysconfig/memcached
Reason: Configuring Memcached to listen on all IPs (0.0.0.0) allows components from other VMs to connect to Memcached, enabling them to cache and retrieve data.
e. Firewall Configuration
Start the firewall and allow incoming connections on Memcached ports:
systemctl start firewalld
systemctl enable firewalld
firewall-cmd --zone=public --add-port=11211/tcp --permanent
firewall-cmd --reload
Reason: We configure the firewall to allow incoming connections on port 11211/tcp, ensuring components can communicate with Memcached. Enabling the firewall ensures the port remains open even after a reboot, enhancing security.
4. Setting Up RabbitMQ
a. Accessing the RabbitMQ VM
SSH into the RabbitMQ VM:
vagrant ssh rmq01
b. RabbitMQ Setup
Log in as a user with sudo privileges:
sudo suUpdate the operating system:
yum update -yInstall the EPEL repository:
yum install epel-release -yInstall RabbitMQ-38:
dnf --enablerepo=centos-rabbitmq-38 -y install rabbitmq-server
Reason We update the OS and install the EPEL repository for the latest updates and additional software. RabbitMQ-38 is essential for communication between the different services in our application.
c. Starting and Enabling RabbitMQ
Start and enable the RabbitMQ service:
systemctl enable --now rabbitmq-server
Reason: We start and enable RabbitMQ to ensure it's running and set to start automatically on boot.
d. RabbitMQ User Setup
Configure RabbitMQ to allow users to connect:
sh -c 'echo "[{rabbit, [{loopback_users, []}]}]." > /etc/rabbitmq/rabbitmq.config'Create a user "test" and make it an administrator:
rabbitmqctl add_user test testsudo rabbitmqctl set_user_tags test administratorsudo systemctl restart rabbitmq-serverReason: This allows secure access to RabbitMQ, and we create an admin user for management purposes.
e. Firewall-Configuration
Start the firewall and allow incoming connections on RabbitMQ port 5672:
systemctl start firewalld
systemctl enable firewalldfirewall-cmd --add-port=5672/tcp --permanentfirewall-cmd --reload
Reason: We configure the firewall to allow incoming connections on RabbitMQ port 5672, ensuring secure communication between services. Enabling the firewall ensures the port remains open even after a reboot.
5. Setting Up Tomcat
a. Accessing the Tomcat VM
SSH into the Tomcat VM:
vagrant ssh app01
b. Tomcat Setup
Log in as a user with sudo privileges:
sudo suUpdate the operating system:
yum update -yInstall the EPEL repository:
yum install epel-release -yInstall Java 11 and Git:
dnf -y install java-11-openjdk java-11-openjdk-develdnf install git -y
Reason We update the OS and install the EPEL repository to ensure the latest updates and access to additional software. Java 11 and Git are required for our Tomcat setup.
c. Tomcat Installation
Change to the /tmp directory:
cd /tmp/Download Apache Tomcat:
wget https://archive.apache.org/dist/tomcat/tomcat-9/v9.0.75/bin/apache-tomcat-9.0.75.tar.gztar xzvf apache-tomcat-9.0.75.tar.gz
d. Adding a Tomcat User
Add a Tomcat system user:
useradd --home-dir /usr/local/tomcat --shell /sbin/nologin tomcat
e. Copying Tomcat Data
Copy Tomcat data to its home directory and make the "tomcat" user the owner:
cp -r /tmp/apache-tomcat-9.0.75/* /usr/local/tomcat/chown -R tomcat.tomcat /usr/local/tomcat
f. Configuring Tomcat as a Service
Create a systemd service file for Tomcat:
vi /etc/systemd/system/tomcat.service
Add the following content to the file:
[Unit]
Description=Tomcat
After=network.target

[Service]
User=tomcat
WorkingDirectory=/usr/local/tomcat
Environment=JRE_HOME=/usr/lib/jvm/jre
Environment=JAVA_HOME=/usr/lib/jvm/jre
Environment=CATALINA_HOME=/usr/local/tomcat
Environment=CATALINE_BASE=/usr/local/tomcat
ExecStart=/usr/local/tomcat/bin/catalina.sh run
ExecStop=/usr/local/tomcat/bin/shutdown.sh
SyslogIdentifier=tomcat-%i

[Install]
WantedBy=multi-user.target
Save the file and exit the text editor.
g. Reloading systemd Files
Reload systemd files:
systemctl daemon-reload
Reason: We start and enable Tomcat to ensure it's running and set to start automatically on boot.
h. Starting and Enabling Tomcat
Start and enable the Tomcat service:
systemctl start tomcatsystemctl enable tomcat
i. Firewall Configuration
Start the firewall and allow incoming connections on Tomcat port 8080:
systemctl start firewalldsudo systemctl enable firewalldfirewall-cmd --zone=public --add-port=8080/tcp --permanentfirewall-cmd --reload
Reason: We configure the firewall to allow incoming connections on Tomcat port 8080, ensuring access to the Tomcat web interface. Enabling the firewall ensures the port remains open even after a reboot.
6. Setting Up Nginx
a. Accessing the Nginx VM
SSH into the Nginx VM:
vagrant ssh web01
b. Nginx Setup
Log in as a user with sudo privileges:
sudo -iUpdate the operating system:
apt update && upgradeInstall Nginx:
apt install nginx -y
Reason We updated the OS and installed Nginx, which will act as our reverse proxy server and load balancer for the Tomcat instances.
c. Nginx Configuration
Create a new Nginx configuration file:
vi /etc/nginx/sites-available/vproappUpdate the file with the following content:
upstream vproapp { server app01:8080;}server { listen 80; location / { proxy_pass http://vproapp; }}
d. Removing Default Nginx Configuration
Remove the default Nginx configuration:
rm -rf /etc/nginx/sites-enabled/default
e. Creating a Link for the Nginx Configuration
Create a symbolic link to activate the website:
ln -s /etc/nginx/sites-available/vproapp /etc/nginx/sites-enabled/vproapp
f. Restarting Nginx
systemctl restart nginxsystemctl status nginx # confirm if service is running
7. Website Verification
To verify the website in your browser, follow these steps:
Verify the website on the browser
Obtain the IP address from your Nginx server by running the following command:
ip addr showOpen your web browser and enter the IP address in the address bar, like this:
http://<ip_addr>:80 # For example, http://192.168.56.51
Make sure to replace <ip_addr> with the actual IP address obtained in step 1.
By following these steps, you can easily verify your website in the browser using the Nginx server's IP address.
Voila, your site is live!
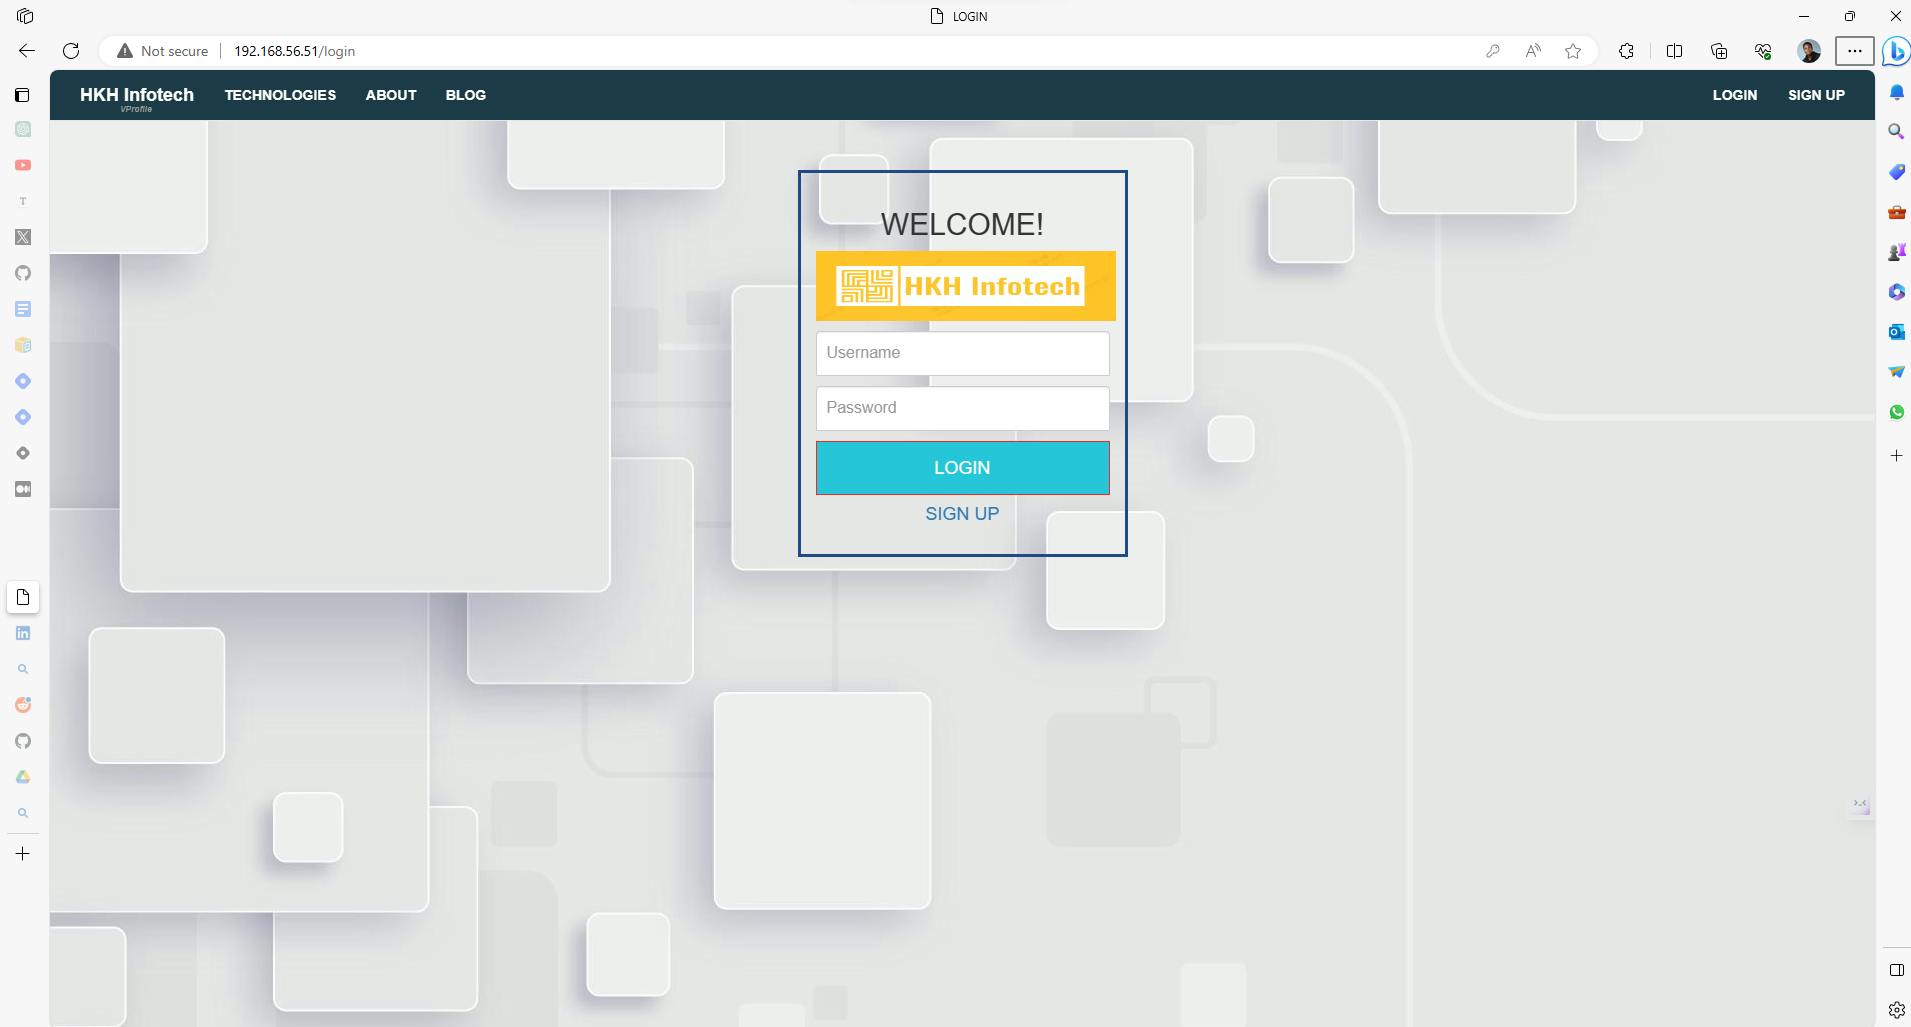
username: admin_vp | password: admin_vp
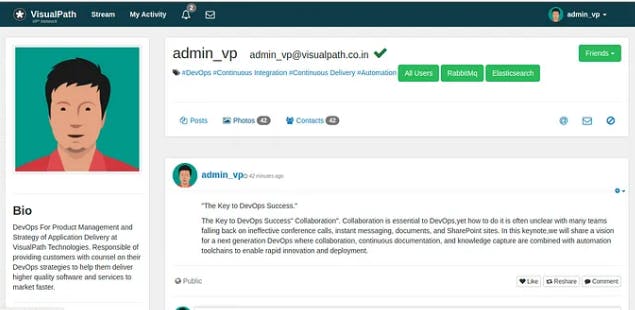
The Backend service is up and running.
Conclusion
Congratulations! You've successfully set up a local multi-tier Java web application using Vagrant, VirtualBox, MySQL, Memcached, RabbitMQ, Tomcat, and Nginx. You've learned valuable DevOps skills along the way, from creating a multi-machine Vagrant environment to configuring essential services.
Here's a quick summary of what you've accomplished:
Created a Vagrant environment with five virtual machines, each serving a specific purpose.
Set up a MySQL database, initialized it with data, and secured it.
Configured Memcached for data caching.
Installed RabbitMQ for communication between application components.
Set up Tomcat as the backend application server.
Configured Nginx as a reverse proxy server and load balancer.
As you continue on your DevOps journey, consider exploring further and customizing your environment. You can deploy your own applications, experiment with various configurations, and deepen your understanding of DevOps concepts.
For a more production-ready approach, think about automating these setup steps using powerful tools like Ansible or Docker. Automation can streamline the deployment process and enhance efficiency, especially in larger-scale environments. Always prioritize best practices for security, scalability, and maintenance.
We hope this guide has not only been educational but also enjoyable for you. Remember that DevOps is a dynamic field, and there's always something new to learn and discover. Happy coding, and best of luck with your future DevOps adventures!
Appendix:
Special Thanks to:
- hkcoder: For providing the reference project.
Troubleshooting Tips:
- ChatGPT: For assisting with problem-solving and providing guidance.
Additional Resources and References:
- Link to PDF Documentation: Access the detailed documentation for additional information and guidance.